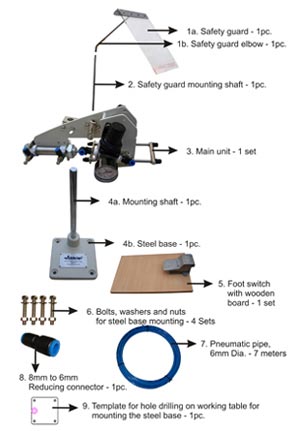
- .Make four 9mm diameter holes on your working table as per the template for hole drilling provided.
- Using the four sets of bolts, washers and nuts provided, fix the steel base (fitted with the mounting shaft) on your working table.
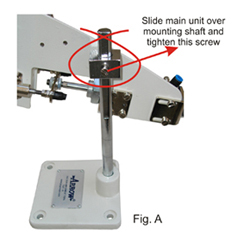
- Position the main unit by sliding it over the mounting shaft as shown in Fig. A, and then tighten the lock screw to firmly fix it.
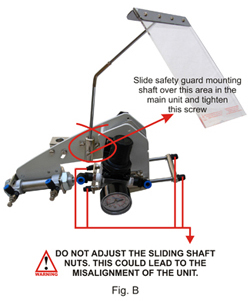
- Fasten the safety guard mounting shaft to the safety guard elbow.
- Fasten the safety guard mounting shaft [now fitted with the safety guard + elbow] onto the main unit as indicated in Fig. B, and tighten the screw on the main unit.
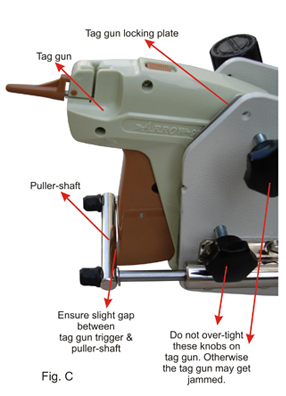
- Mount the tag gun onto the front unit as shown in Fig. C. Take care that the tag gun locking plate is onto the right side of the tag gun, such that it is positioned between the tag gun and the side knobs. Then tighten the side knobs to hold the tag gun firmly onto the main unit. Do not over tighten these knobs. Tighten the knobs to the extent you are able to freely push the trigger of the gun without jamming. Ensure there is a little gap between the trigger and the puller-shaft as shown in Fig. C.
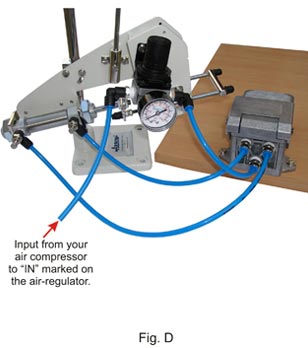
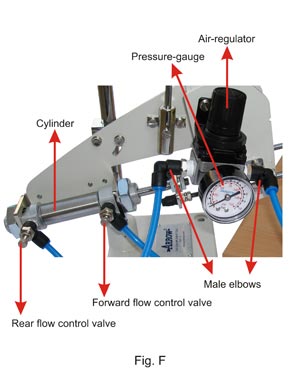
- The pneumatic connections must be made as indicated in Fig. D. Connect the incoming air line to the air-regulator where it is marked as "IN". From the "OUT" of the air-regulator, connect to port marked as "1" of foot-switch. From "2" marked on the foot-switch, connect to rear flow control valve on the cylinder. From "4" marked on the foot-switch, connect to forward flow control valve on the cylinder.
- Load your tag gun with the suitable fastener, release the input of air into the unit, and you are ready to use the tag gun operated by the foot switch.
|